How to Bridge Assets to Story Protocol: A Complete Guide
2025-02-25
Story Protocol is built to tokenize and manage intellectual property, but to interact with its ecosystem, you need funds in your wallet. Since most assets are held on Ethereum, Solana, Base, or other networks, direct access to funds on Story Protocol isn't always possible.
To move your assets, you’ll need a cross-chain bridge. These bridges allow users to transfer ETH, USDC, and other tokens from different networks to Story Protocol efficiently.
One widely used option is deBridge, which supports multiple blockchains, but there are also other reliable bridges that users can explore.
The image below illustrates the onboarding process for Story Protocol. To get started, you must have a wallet, fund your account, and then explore apps. If your funds aren’t already on Story Protocol, you’ll need to bridge them from another network.
Why You Need a Cross-Chain Bridge for Story Protocol
Bridging is necessary because Story Protocol operates on its blockchain, meaning assets from Ethereum, Solana, or other networks must be transferred using a bridge. The main advantages of using a cross-chain bridge include:
Source: deBridge
- Accessing Story Protocol applications – Many apps require ETH or USDC to function.
- Interacting with smart contracts – If you want to monetize intellectual property on-chain, you need assets in your Story Protocol wallet.
- Seamless cross-network transactions – A bridge enables easy movement of tokens without relying on centralized exchanges.
Several bridges support transfers to Story Protocol, offering varying speeds, fees, and security levels. deBridge is one of the well-known options, providing fast transfers and support for multiple networks. Users should always check the latest bridge options to choose the best one for their needs.
Step-by-Step Guide to Bridging Assets to Story Protocol
- Connect Your Wallet
Visit a bridge that supports Story Protocol, such as deBridge, and connect your wallet. Compatible wallets include MetaMask, Coinbase Wallet, and Trust Wallet. - Select Networks and Tokens
Choose the source network where your assets are currently held (Ethereum, Solana, Base, etc.) and set Story Protocol as the destination. Select the token you want to bridge. ETH is recommended due to lower transaction fees and high liquidity. - Approve the Transaction
Enter the amount you wish to transfer and approve the transaction in your wallet. You may need to confirm multiple prompts depending on the network’s security measures. - Complete the Bridge
Once the transaction is approved, the bridge will process the transfer. Your funds should arrive in your Story Protocol wallet within minutes, depending on network conditions.
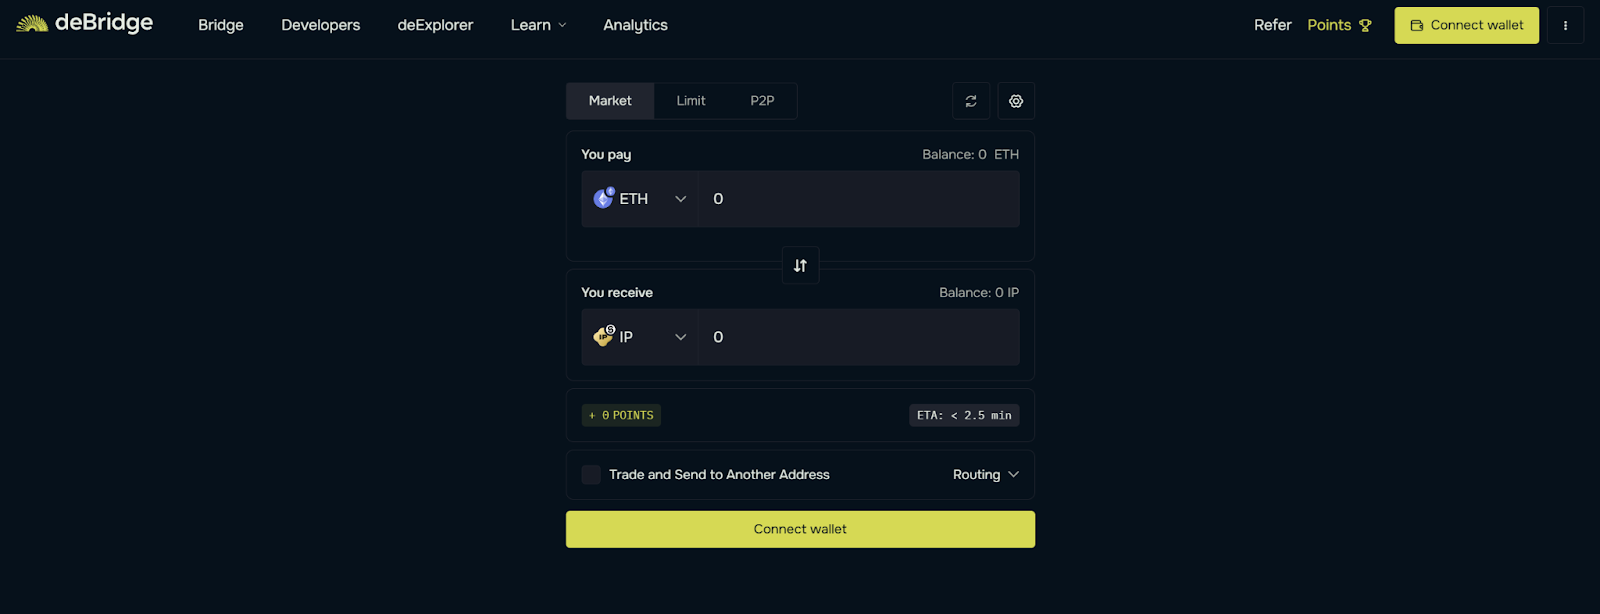
Source: deBridge
Understanding Bridging Fees
When bridging assets to Story Protocol, users incur two types of costs:
- Network gas fees – These depend on the source chain and can fluctuate based on congestion. Estimated fees include:
- Ethereum Mainnet: $5 to $10
- Layer 2 Networks (Base, Optimism, Arbitrum): Around $1
- Layer 1 Networks (Solana, Avalanche, BNB Chain): Approximately $0.50
- Bridge service fee – Most bridges charge a small fee for processing the transfer. For example, deBridge charges a flat 0.01 IP fee, which may change based on governance updates.
Users should always check the latest fee structure before making a transfer.
Read more: How to Earn Rewards and Secure the Story Protocol Network
Earn 10% APR with IP Staking on Bitrue
Once your assets are on Story Protocol, you may want to use them to generate passive income. Bitrue’s Power Piggy allows users to lock IP tokens and earn 10% APR.
Bitrue is a well-known cryptocurrency exchange that offers staking opportunities through its Power Piggy feature. By locking IP tokens, users can earn passive rewards without actively trading.
To stake IP on Bitrue:
- Sign up on Bitrue – If you don’t have an account, create one on the official platform.
- Deposit IP tokens – Transfer your IP from Story Protocol or another source.
- Go to Power Piggy – Locate the staking section and find IP staking.
- Lock your tokens – Choose the staking duration and confirm your participation.
This option provides a way to earn rewards while holding IP tokens, making it a useful feature for long-term investors.

Conclusion
Bridging assets to Story Protocol is an essential step for users who want to interact with its ecosystem. Since most assets are held on other blockchains, using a cross-chain bridge is necessary to transfer ETH, USDC, or other tokens.
Several bridges support Story Protocol, allowing for secure and efficient transfers. deBridge is one of the available options, offering fast transactions and multi-network compatibility. Before bridging, users should check fees and ensure they have enough funds for the transfer.
For those holding IP tokens, Bitrue’s Power Piggy provides an opportunity to earn 10% APR by locking tokens for passive rewards. This staking option allows users to benefit from their holdings while participating in Story Protocol’s ecosystem.
Frequently Asked Questions
1. Can I bridge assets from Ethereum to Story Protocol?
Yes, you can transfer assets from Ethereum to Story Protocol using cross-chain bridges. Simply connect your wallet, select the token, and confirm the transaction.
2. How long does it take to bridge to Story Protocol?
Transfer times depend on the bridge and network congestion. Most transactions are completed within minutes.
3. What assets can I bridge to Story Protocol?
Commonly supported assets include ETH, USDC, USDT, and IP tokens. The list of supported tokens may expand as Story Protocol grows.
Investor Caution
While the crypto hype has been exciting, remember that the crypto space can be volatile. Always conduct your research, assess your risk tolerance, and consider the long-term potential of any investment.
Bitrue Official Website:
Website: https://www.bitrue.com/
Sign Up: https://www.bitrue.com/user/register
Disclaimer: The views expressed belong exclusively to the author and do not reflect the views of this platform. This platform and its affiliates disclaim any responsibility for the accuracy or suitability of the information provided. It is for informational purposes only and not intended as financial or investment advice.
Disclaimer: The content of this article does not constitute financial or investment advice.


